This post contains affiliate links. This means I will make a commission at no extra cost to you should you click through and make a purchase [ “As an Amazon Associate, I earn from qualifying purchases.” ]. Read the full disclosure here.
Honda Pilot Alternator GuideMechanic.Com When it comes to the Honda Pilot, one crucial component that keeps the vehicle’s electrical system running smoothly is the alternator.
In this comprehensive guide, we will delve into the details of the Honda Pilot alternator, covering everything from its function and importance to common issues and maintenance tips.
Whether you are a Honda Pilot owner or just curious about how alternators work, this article will provide you with a wealth of knowledge.
Understanding the Alternator

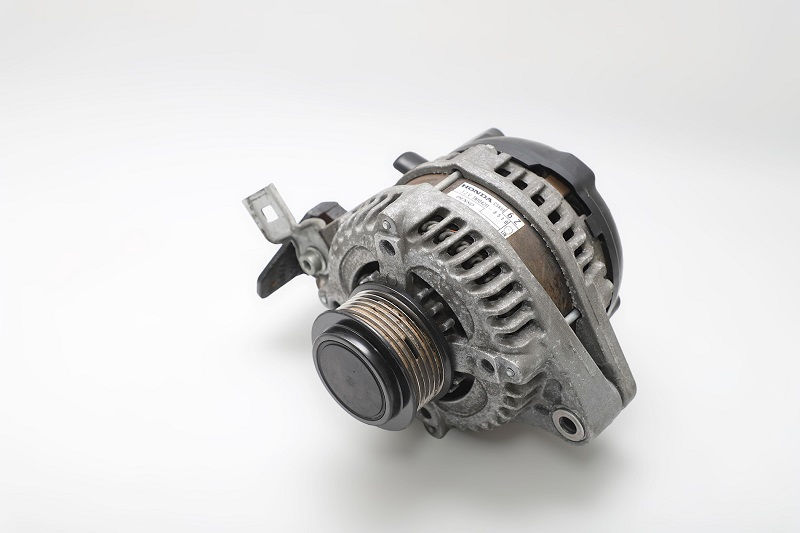
The alternator plays a vital role in the Honda Pilot’s electrical system. It is responsible for converting mechanical energy into electrical energy, which powers the various electrical components of the vehicle and charges the battery. Understanding how the alternator works is crucial in recognizing its importance.
How Does the Alternator Work?
The alternator is driven by the engine through a belt, typically the serpentine belt. As the engine rotates, it spins the alternator’s rotor, which is surrounded by a stator with wire windings. This rotation induces a magnetic field in the stator windings, creating an alternating current (AC).
The AC current produced by the alternator goes through a rectifier, a set of diodes that convert it into direct current (DC).
See Also: 2013 Honda Accord Catalytic Converter
The DC current is then sent to the battery, where it is stored for later use. Simultaneously, the alternator supplies the electrical power needed to operate the various components of the Honda Pilot, such as the lights, radio, and air conditioning system.
Features and Specifications of the Honda Pilot Alternator
The Honda Pilot alternator is specifically designed to meet the electrical demands of the vehicle. It is built to deliver a specific amount of power, measured in amps, to ensure the proper functioning of all electrical components. The alternator’s voltage output is typically around 14 volts, which is necessary to charge the battery effectively.
Additionally, the Honda Pilot alternator is equipped with various safety features to protect against electrical surges and prevent damage to the vehicle’s electrical system.
These features include voltage regulators, which regulate the voltage output, and diodes, which prevent backward current flow.
Signs of a Failing Alternator

Recognizing the signs of a failing alternator is crucial for every Honda Pilot owner. Ignoring these warning signs can lead to battery drain, electrical component failures, and ultimately, a stranded vehicle.
By being aware of the following symptoms, you can take prompt action to address any potential alternator issues.
Dimming Headlights and Electrical System Weakness
One of the most common signs of a failing alternator is dimming headlights. If you notice that your headlights appear dimmer than usual, especially when you accelerate or use other electrical components, it could indicate an insufficient power supply from the alternator.
Similarly, you may experience weakness in your electrical system, such as slow power window operation or a sluggish radio display.
Dead Battery
A dead or constantly draining battery is another clear indication of an alternator problem. While a battery issue could be standalone, a failing alternator may not be supplying enough power to recharge the battery.
If you frequently find yourself jump-starting your Honda Pilot or needing to replace the battery, it’s essential to have your alternator checked.
Strange Noises
Unusual noises coming from the alternator area can be a sign of internal component failure. If you hear grinding, squealing, or rattling sounds, it could indicate a worn-out bearing, a loose belt, or a faulty internal component. Addressing these noises promptly can prevent further damage to the alternator.
Flickering or Malfunctioning Lights
If you notice that your lights flicker or randomly turn on and off, it could be an indication of alternator issues.
See Also: 2010 Honda Accord Catalytic Converter Location
The fluctuation in power supply from the failing alternator can cause the lights to behave erratically.
Pay attention to all the lights in your Honda Pilot, including the headlights, interior lights, and dashboard lights.
Electrical Failures
A failing alternator can also cause various electrical component failures. You may experience issues with your power windows, air conditioning system, radio, or other electrical accessories.
If multiple electrical components are malfunctioning simultaneously, it is likely due to a problem with the alternator.
Diagnosing Alternator Issues

When faced with an alternator problem, it is essential to diagnose the issue accurately. By understanding the diagnostic process, you can determine whether the alternator is indeed the culprit and take appropriate measures to address the problem.
Testing the Voltage Output
The first step in diagnosing an alternator problem is to test its voltage output. You will need a multimeter to measure the voltage at the battery terminals.
Start the engine and let it idle while you connect the multimeter. A healthy alternator should produce a voltage around 13.5 to 14.5 volts. If the voltage is significantly lower or higher, it indicates a potential alternator issue.
Checking for Loose Connections
Loose or corroded electrical connections can also cause problems with the alternator’s performance. Inspect the battery terminals and alternator connections for any signs of looseness or corrosion.
Tighten any loose connections and clean off any corrosion using a wire brush and a battery terminal cleaner spray. Ensure all connections are secure and free from debris.
Using a Multimeter for Further Testing
If the voltage output and connections appear to be in order, a more detailed multimeter test can help identify any internal alternator issues. This test requires technical expertise and is best performed by a professional mechanic.
The multimeter can measure the current output, ripple voltage, and diode functionality, providing a more accurate assessment of the alternator’s condition.
Consulting a Professional Mechanic
If you are unsure about diagnosing the alternator problem yourself or if the initial tests indicate a potential issue, it is recommended to consult a professional mechanic.
They have the expertise and diagnostic tools to pinpoint the exact cause of the problem and provide the most effective solution. A mechanic can also perform additional tests, such as a load test, to further evaluate the alternator’s performance.
Replacing the Alternator
If your Honda Pilot requires a new alternator, it is essential to replace it promptly to avoid further electrical issues.
While this task may seem daunting, following a step-by-step process can simplify the replacement procedure and ensure a successful installation.
Preparing for the Replacement
Before replacing the alternator, gather all the necessary tools, including a wrench or socket set, a serpentine belt tool (if required), and a replacement alternator that matches the specifications of your Honda Pilot. Ensure the engine is cool and detached from any power source by removing the negative battery cable.
Removing the Old Alternator
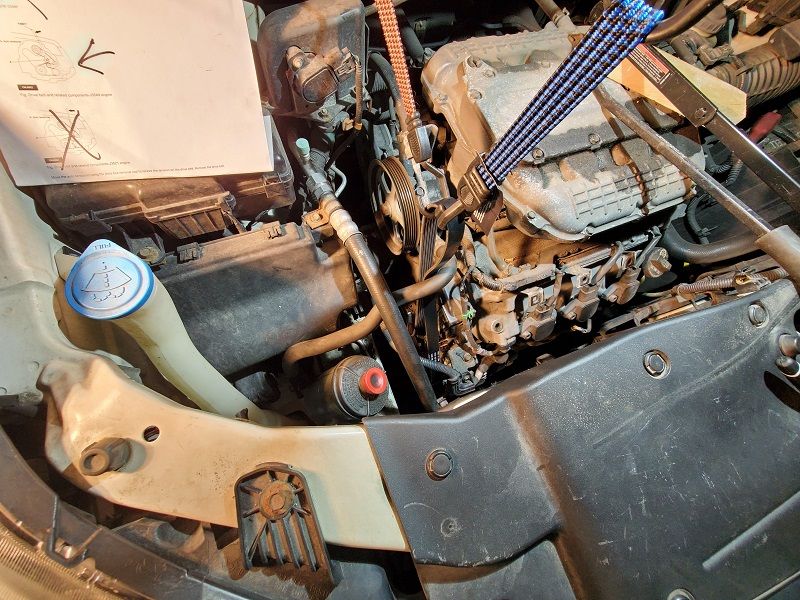
Start by locating the alternator, typically on the front or side of the engine. Loosen the belt tensioner and remove the serpentine belt from the alternator pulley.
See Also: 2000 Honda CR-V catalytic converter
Disconnect the electrical connections, such as the positive lead and any sensor or plug attached to the alternator.
Finally, remove the bolts securing the alternator to the mounting bracket and carefully extract the old alternator from the engine compartment.
Selecting the Right Replacement Part
Choosing the right replacement alternator is crucial for optimal performance and compatibility with your Honda Pilot. Ensure you select an alternator that matches the specifications of the original part. Consider purchasing a genuine Honda alternator or a high-quality aftermarket alternator from a reputable supplier to ensure reliability and longevity.
Installing the New Alternator
Begin the installation by positioning the new alternator in the mounting bracket and securing it with the bolts. Reconnect the electrical connections, ensuring they are properly attached and secure. Then, route the serpentine belt back onto the alternator pulley, following the appropriate belt routing diagram for your specific Honda Pilot model. Finally, use a serpentine belt tool or a wrench to apply tension to the belt, ensuring it is properly tensioned.
Testing the New Alternator
After replacing the alternator, it is crucial to test its functionality. Reconnect the negative battery cable and start the engine. Use a multimeter to measure the voltage output at the battery terminals. The reading should be within the acceptable range, typically around 13.5 to 14.5 volts, indicating that the new alternator is functioning correctly.
Preventive Maintenance Tips
Maintaining the alternator is vital to ensure its longevity and avoid unexpected breakdowns. By following some essential preventive maintenance tips, you can keep your Honda Pilot alternator in excellent condition and prolong its lifespan.
Regular Inspections
Performing regular visual inspections of your alternator can help detect any potential issues early on. Check for signs of wear, damage, or loose connections. Look for frayed or cracked belts, corrosion on the terminals, and any unusual noises or smells. Timely identification of these problems can prevent further damage to the alternator and the electrical system.
Cleaning and Dusting
Keeping the alternator clean from dust, dirt, and debris is essential for its proper functioning. Use asoft brush or compressed air to remove any accumulated dirt or debris from the alternator’s exterior. Be cautious not to damage any delicate components or wiring while cleaning. Regular cleaning can help maintain optimal airflow and prevent overheating of the alternator.
Checking the Belt Tension
The serpentine belt that drives the alternator should be properly tensioned for efficient operation. Over time, the belt may become loose or worn, affecting the alternator’s performance. Regularly check the belt tension and adjust it if necessary. Refer to your Honda Pilot’s owner’s manual for the correct tension specifications and follow the recommended procedure to adjust the belt tension properly.
Inspecting and Cleaning Electrical Connections
Corroded or loose electrical connections can disrupt the flow of electricity to and from the alternator. Periodically inspect the connections and terminals for signs of corrosion, such as a greenish or white residue.
See Also: Brake System Problem Honda Civic
Clean the terminals using a wire brush or a battery terminal cleaner spray to ensure a solid connection. Tighten any loose connections to maintain a reliable electrical connection.
Keeping the Battery in Good Condition
A healthy battery is essential for the proper functioning of the alternator. Regularly check the battery’s overall condition, including the terminals and electrolyte levels. Ensure the battery is securely mounted and free from any corrosion. If you notice any issues with the battery, such as low voltage or difficulty starting the vehicle, have it tested and replaced if necessary.
Maintaining the Electrical System
Proper maintenance of the entire electrical system in your Honda Pilot can contribute to the longevity of the alternator. Avoid overloading the electrical system by not using excessive accessories simultaneously. Be mindful of any aftermarket electrical modifications, as they may put additional strain on the alternator. Regularly inspect and replace any faulty fuses or relays to prevent electrical issues.
Upgrading the Alternator
If you find that the stock alternator in your Honda Pilot is struggling to meet your electrical demands, you may consider upgrading to a higher-output alternator. This upgrade can provide more power to support additional accessories or meet higher electrical demands, ensuring optimal performance of your vehicle’s electrical system. However, it is important to consider a few factors before proceeding with an alternator upgrade.
Power Output Requirements
Assess your specific power requirements before opting for an alternator upgrade. Determine the total electrical load you anticipate using in your Honda Pilot, including any aftermarket accessories. This will help you choose an alternator with the appropriate power output to meet your needs without overtaxing the electrical system.
Aftermarket Options and Compatibility
Research the aftermarket options available for your Honda Pilot model and ensure compatibility with your vehicle. Look for alternators specifically designed for your vehicle’s make and model to ensure proper fitment. Read reviews and seek recommendations from trusted sources to ensure the reliability and performance of the aftermarket alternator.
Installation and Wiring Considerations
An alternator upgrade may require modifications to the wiring and charging system of your Honda Pilot. Consider the complexity of the installation process and whether you have the technical skills or expertise to complete it yourself. If not, consult a professional mechanic or an experienced automotive electrician for assistance to ensure a proper and safe installation.
Frequently Asked Questions
Here are answers to some commonly asked questions about Honda Pilot alternators:
1. How long do Honda Pilot alternators typically last?
The lifespan of a Honda Pilot alternator can vary depending on various factors, such as driving conditions, maintenance practices, and the electrical load placed on the alternator. On average, a well-maintained alternator can last anywhere from 80,000 to 150,000 miles.
2. Is the alternator covered under my Honda Pilot’s warranty?
The alternator may be covered under your Honda Pilot’s warranty, depending on the specific terms and duration of the warranty. Consult your vehicle’s warranty documentation or contact your local Honda dealership for more information about warranty coverage for alternator-related issues.
3. Are aftermarket alternators as reliable as genuine Honda alternators?
While there are reputable aftermarket alternators available, genuine Honda alternators are designed specifically for your Honda Pilot and are engineered to meet the highest quality and performance standards. Opting for a genuine Honda alternator can provide peace of mind and ensure compatibility with your vehicle.
4. Can I use a higher-output alternator on my Honda Pilot without any modifications?
Using a higher-output alternator may require modifications to the wiring and charging system of your Honda Pilot.
See Also: What Is The Average Life Of A Honda Fit Battery?
The increased power output can put additional strain on other components, such as the battery and voltage regulator. Consult a professional to ensure proper installation and compatibility with your vehicle’s electrical system.
5. Can I replace the alternator in my Honda Pilot myself?
Replacing the alternator in your Honda Pilot can be a complex task, especially for those without prior automotive experience. It involves working with electrical connections, belt tensioning, and proper installation. If you are not confident in your abilities, it is recommended to seek professional assistance to ensure a successful and safe alternator replacement.
Alternator Maintenance Checklist
To help you keep track of your alternator’s maintenance needs, here is a comprehensive checklist:
1. Visual Inspection
- Inspect the alternator for signs of wear, damage, or loose connections.
- Check for frayed or cracked belts and replace if necessary.
- Ensure the alternator is free from dirt, debris, and excessive corrosion.
2. Clean and Dust
- Use a soft brush or compressed air to remove dirt and debris from the alternator’s exterior.
- Be careful not to damage any delicate components or wiring during cleaning.
3. Check Belt Tension
- Regularly check the tension of the serpentine belt that drives the alternator.
- Refer to your Honda Pilot’s owner’s manual for the correct tension specifications.
- Adjust the belt tension if necessary to ensure proper operation.
4. Inspect and Clean Electrical Connections
- Inspect the alternator’s electrical connections for signs of corrosion or looseness.
- Clean the terminals using a wire brush or a battery terminal cleaner spray.
- Tighten any loose connections to ensure a solid electrical connection.
5. Maintain the Battery
- Regularly check the battery’s overall condition, including the terminals and electrolyte levels.
- Ensure the battery is securely mounted and free from any corrosion.
- Have the battery tested and replaced if necessary to avoid strain on the alternator.
6. Keep the Electrical System in Good Condition
- Avoid overloading the electrical system by not using excessive accessories simultaneously.
- Regularly inspect and replace any faulty fuses or relays to prevent electrical issues.
- Be mindful of any aftermarket electrical modifications and their impact on the alternator.
Troubleshooting Alternator Issues
While some alternator issues may require professional assistance, here are some common troubleshooting scenarios and possible solutions:
1. Excessive Noise
If you hear grinding, squealing, or rattling sounds coming from the alternator, it could indicate a worn-out bearing, loose belt, or faulty internal component. Consult a professional mechanic or an automotive electrician to diagnose and address the issue.
2. Charging Problems
If your Honda Pilot’s battery is not charging properly, it could be due to a faulty alternator. Check the voltage output using a multimeter and consult a professional to determine if the alternator needs to be replaced or if there are other underlying issues.
3. Sudden Failures
If your alternator fails suddenly, leaving you stranded, it is crucial to address the issue promptly. Check the electrical connections and fuses for any obvious issues. If no visible problems are found, consult a professional mechanic to diagnose and resolve the problem.
Conclusion
In conclusion, the alternator is a critical component of the Honda Pilot’s electrical system, responsible for generating electricity, charging the battery, and powering various electrical components. Understanding the function, signs of failure, and maintenance requirements of the alternator is essential for every Honda Pilot owner.
By recognizing the signs of a failing alternator and performing regular maintenance, you can ensure the longevity and optimal performance of your Honda Pilot’s electrical system. If you encounter any alternator issues, consult a professional mechanic for accurate diagnosis and prompt resolution.
Remember, a well-maintained alternator is crucial for a reliable and efficient electrical system in your Honda Pilot, providing you with a safe and enjoyable driving experience for years to come.
- Boost Up Catalytic Converter Cleaner - April 21, 2025
- Catalytic Converter Price by Model - April 20, 2025
- Catalytic Converter Price Lookup: A Complete Guide - April 20, 2025

